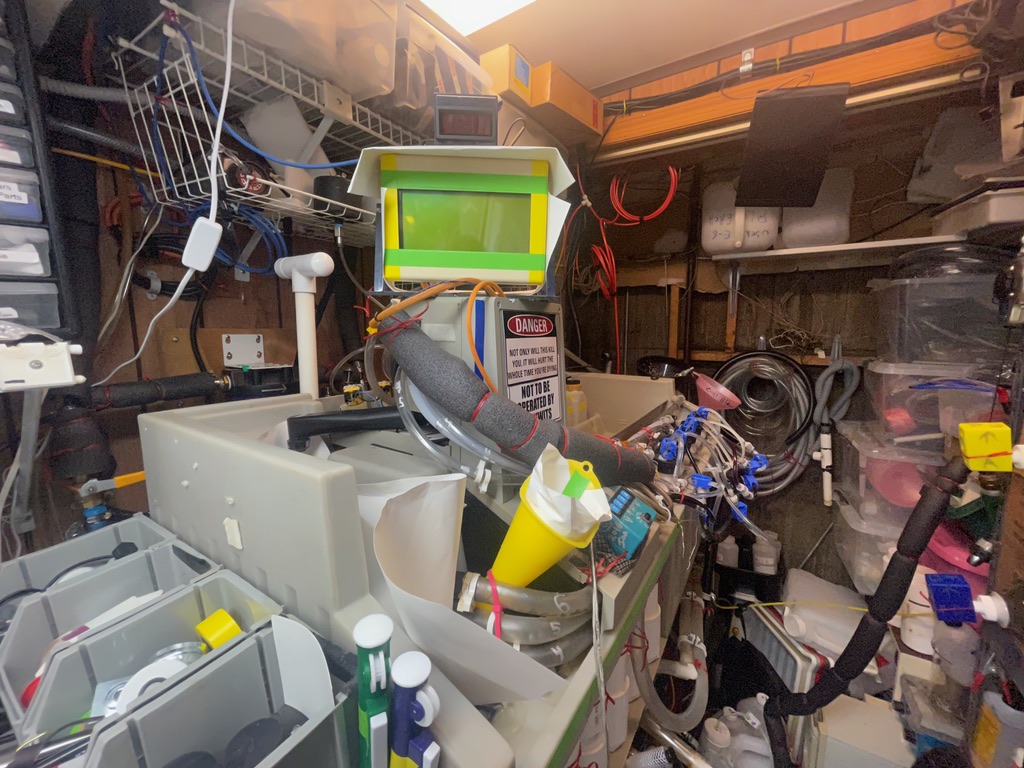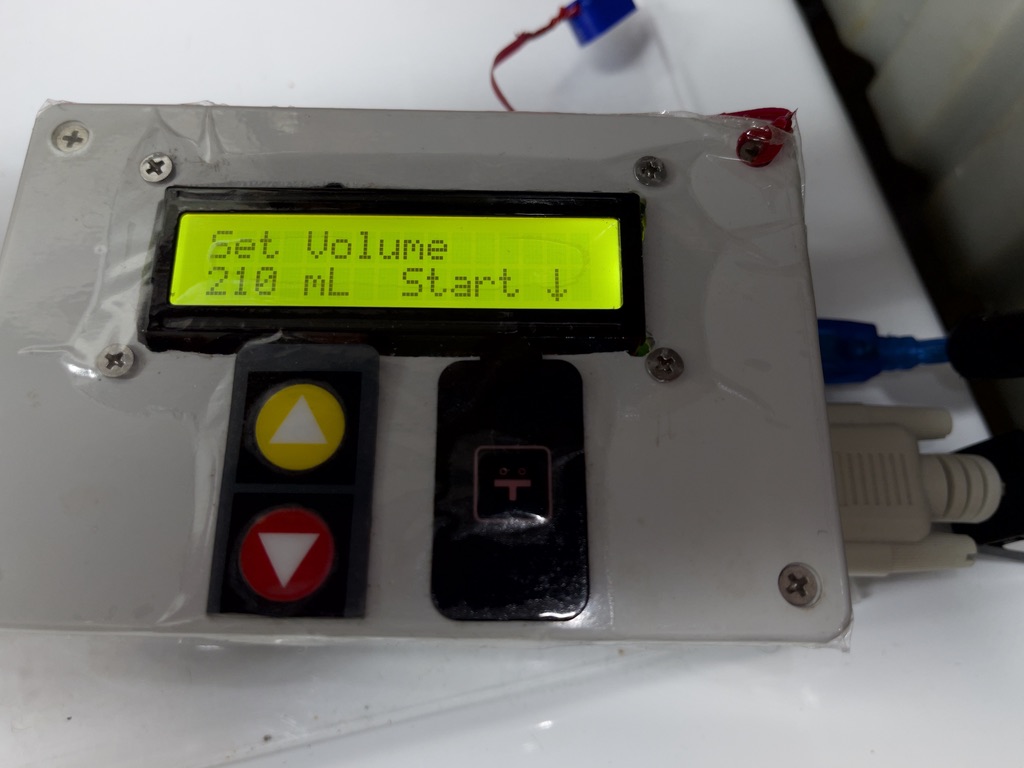
Our Jobo ATL 2300 started life out as an ATL 2200. Its had a hard life!
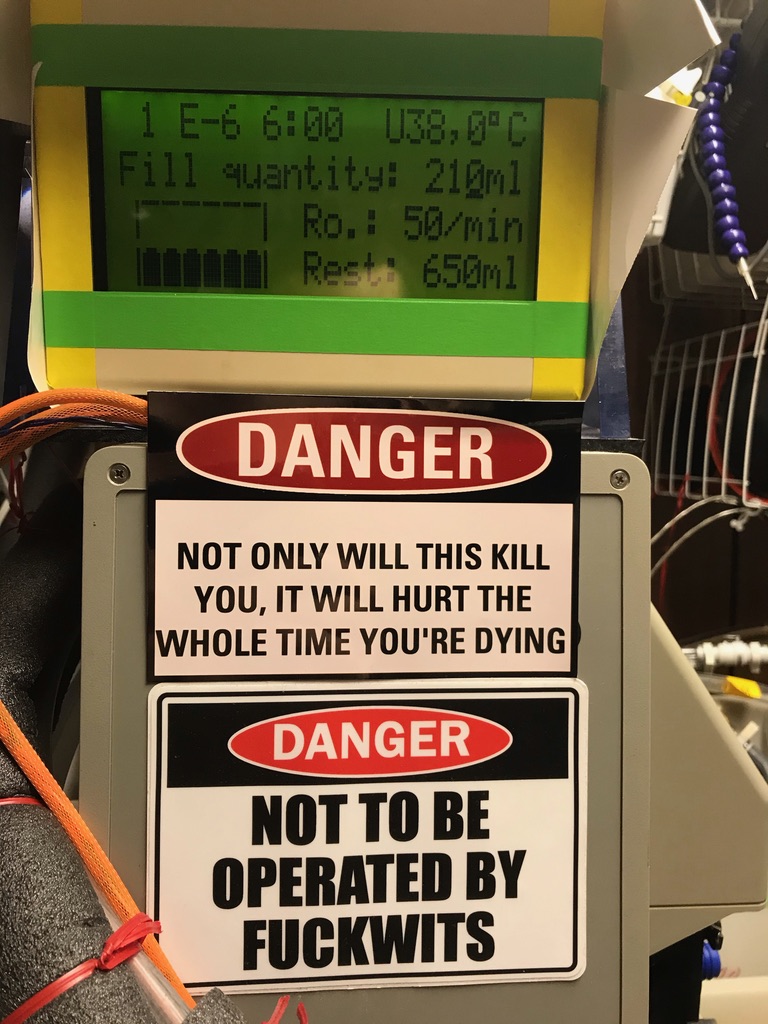
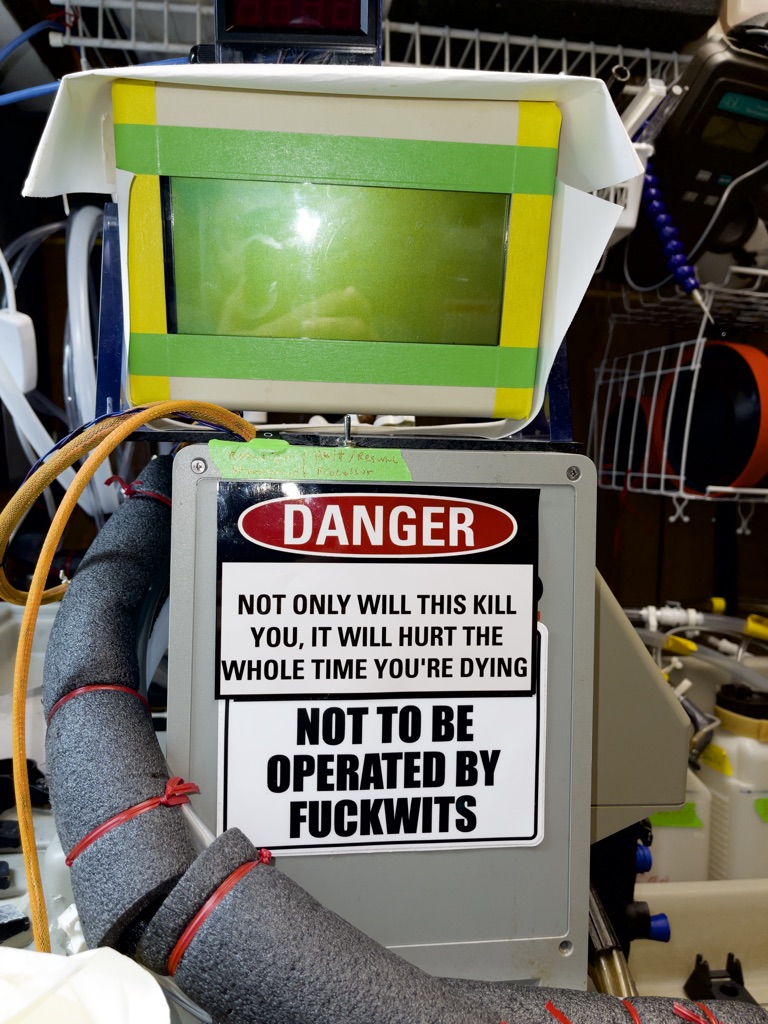
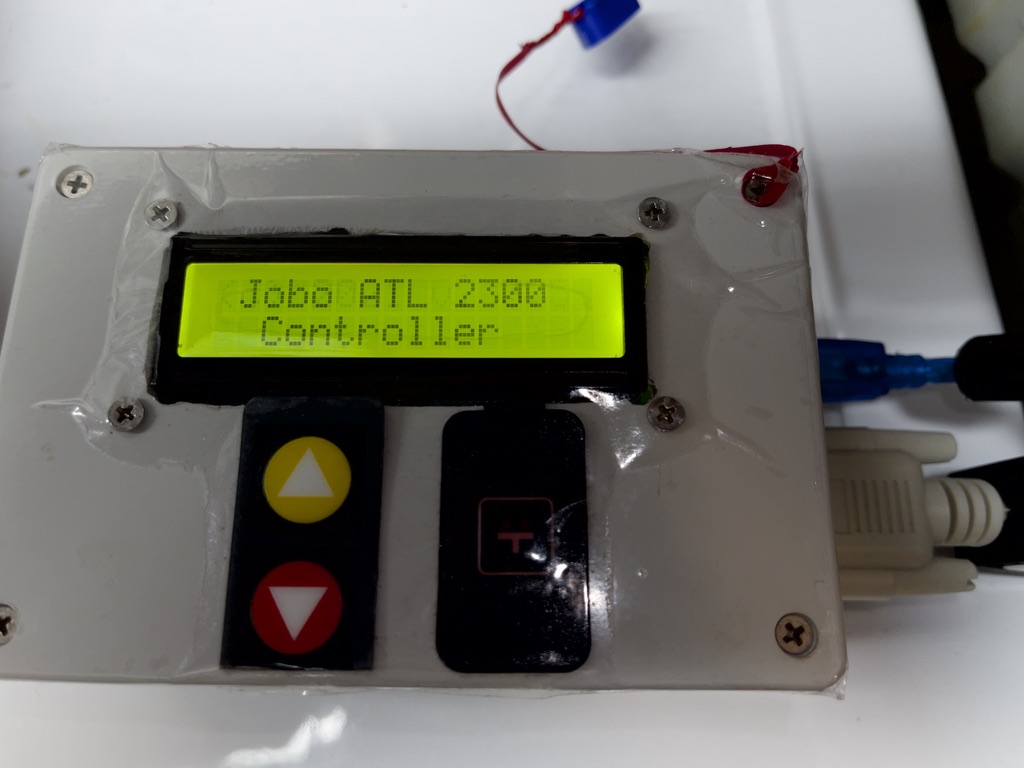
First upgrade was the large LCD display. This is actually the display Jobo used at trade shows!!
It was expensive but you can make the same by buying a large LCD display and hooking it up.
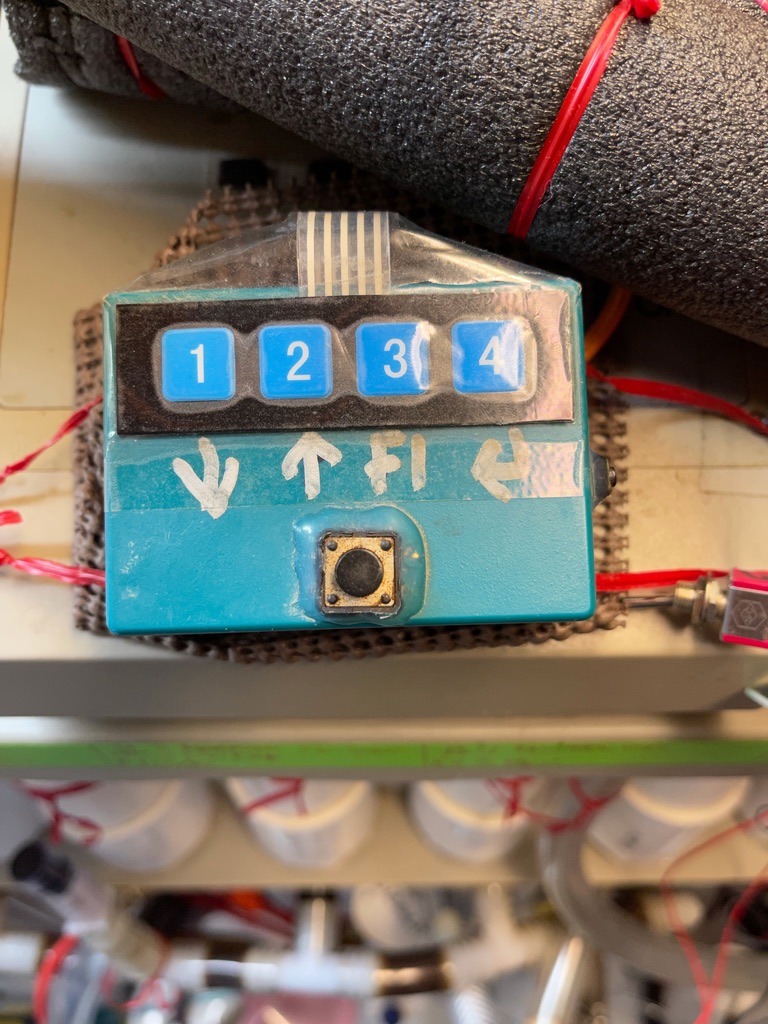
At some point the built in control panels buttons stopped working.
The OEM was a button on flex construction. Over time it suffers from shorts and opens and needs to be replaced.
I happen to have a new button panel but I wasn’t sold on just replacing it with more of the same.
Instead I made my own. Its not hard at all. I even added something I always wanted, a dedicated RESET button!
I ordered the 2300 upgrade kit from Germany. It was expensive but worth it.
The front bottles are dedicated to E-6 and the back are B&W and C-41.
Over the years OEM Jobo parts for all of the ATL series are getting harder to find and more expensive.
I happen to have a large stock of them but I figured I could do better.
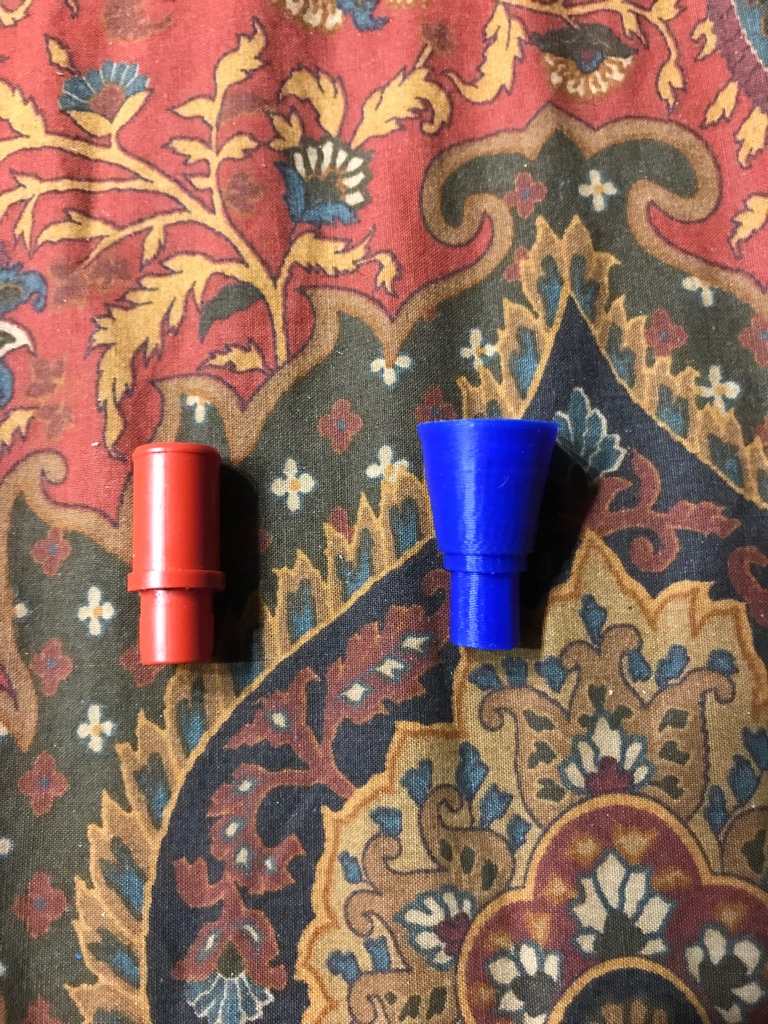
I modeled and printed a number of new parts for the Jobo. That includes some gears not pictured.
The 3d printed parts are made from ABS and have lasted as long and work just as or better than the originals.
The majority of all of the tubing has been replaced. In the US metric tubing is expensive so its all imperial.
The sizes are close enough and it works. The OEM tubing was heat formed, I didn’t go that route, just standard tubing.
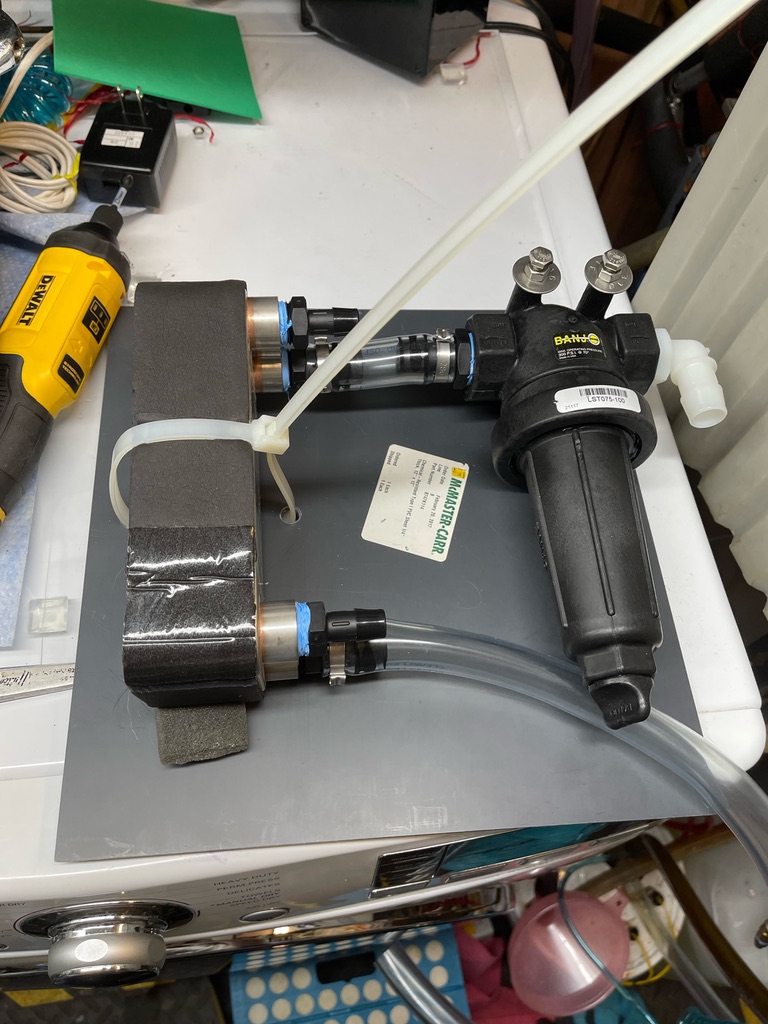
The circulation motor failed and has been replaced. It’s COTS for a VW car. Amazon has them.
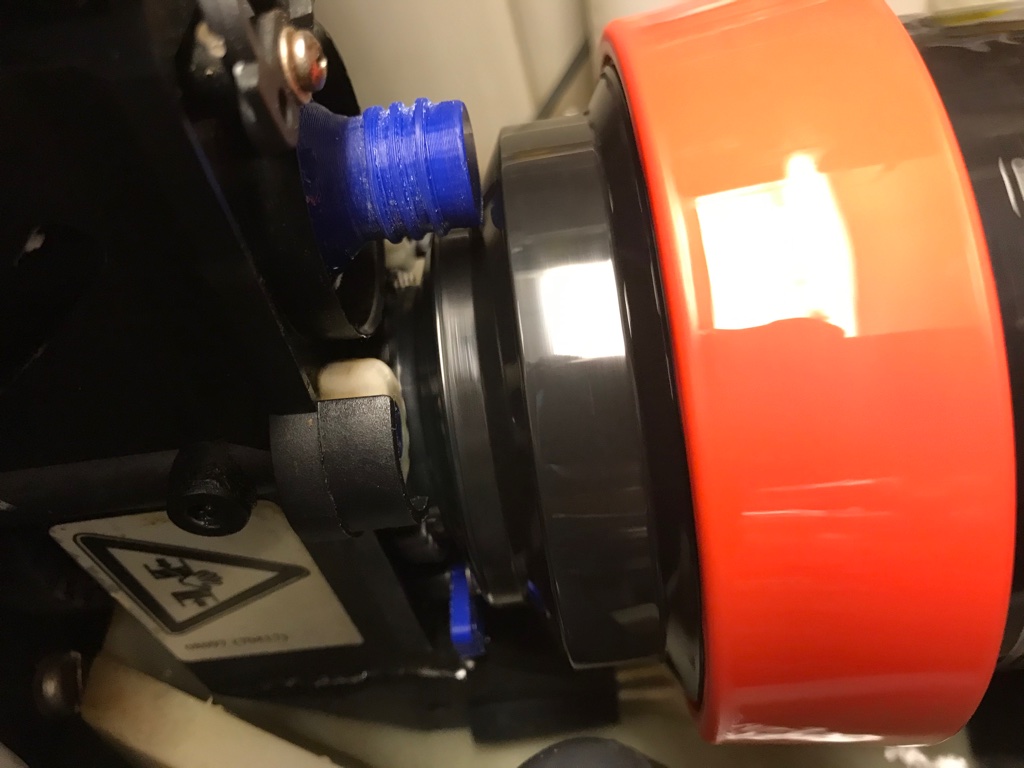
The gearing in the air distributor failed. It’s a nylon gear and it subject a lot of torque.
It rounds off easily, even the new ones I have are a bit rounded.
So that was one of the 3d printed parts and its been working for years.
The lift arm was leaking and that’s a matter of lubricating it and sealing the drain.
A recent addition was a PAUSE and STOP for the 6502 processor and the rotation motor.
Both are simple additions but require some time and soldering.
I also added some PVC pipes to drain the solutions form the processor.
It’s necessary to have large tubes to cope with the potential of up to 1000mL of solution.
That drains in to a bucket with an automatic pump drain.
Another of the many issues is the power entry module.
Recently that was getting extremely hot and had to be replaced. It got so hot that the sand in the fuses melted.
So be careful and change yours out.
Another project was installing a heat exchanger to hopefully stabilize the wash water.
E-6 requires a very specific and stable first wash temperature. If it varies, you can see some changes in the overall color.
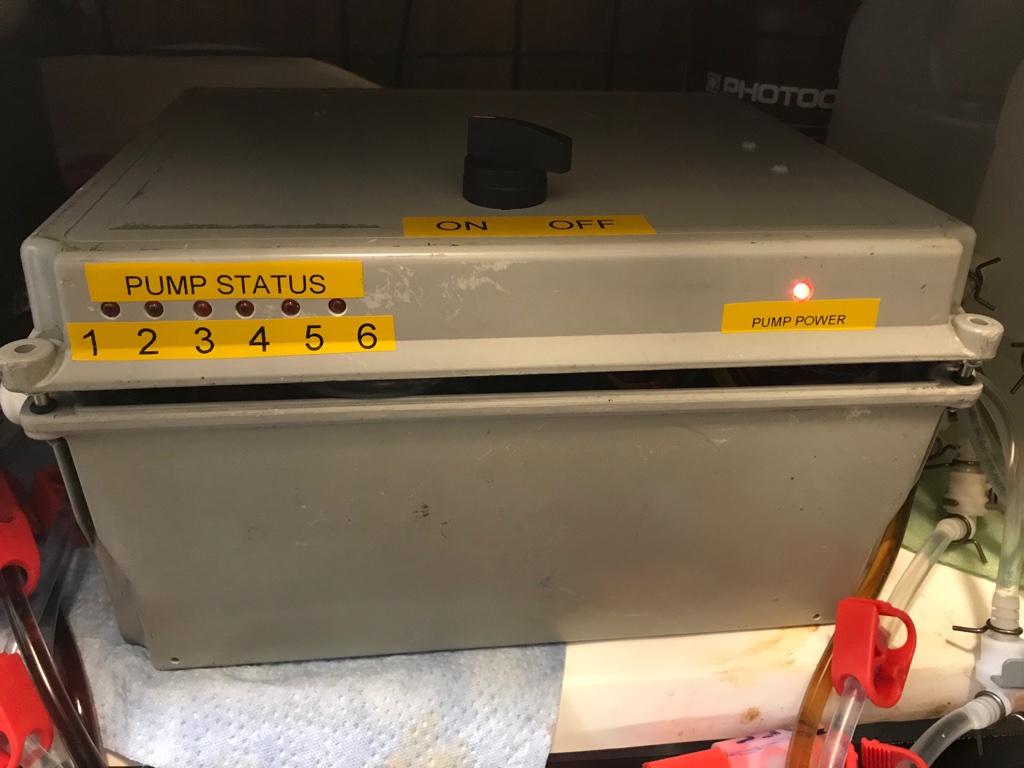
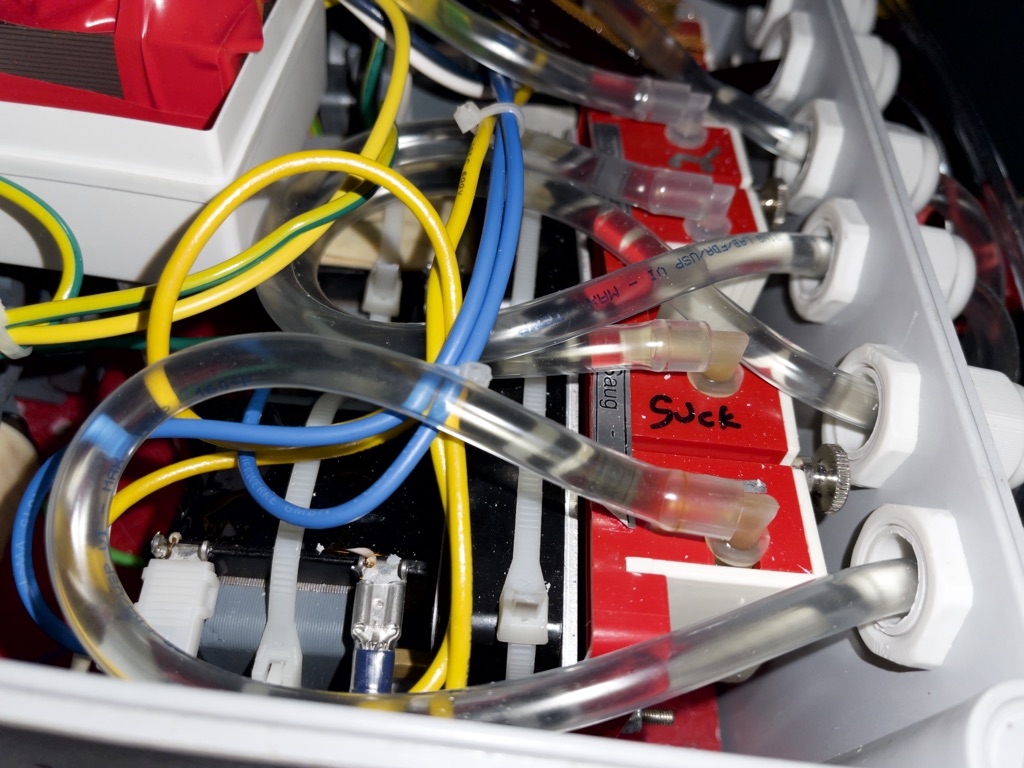
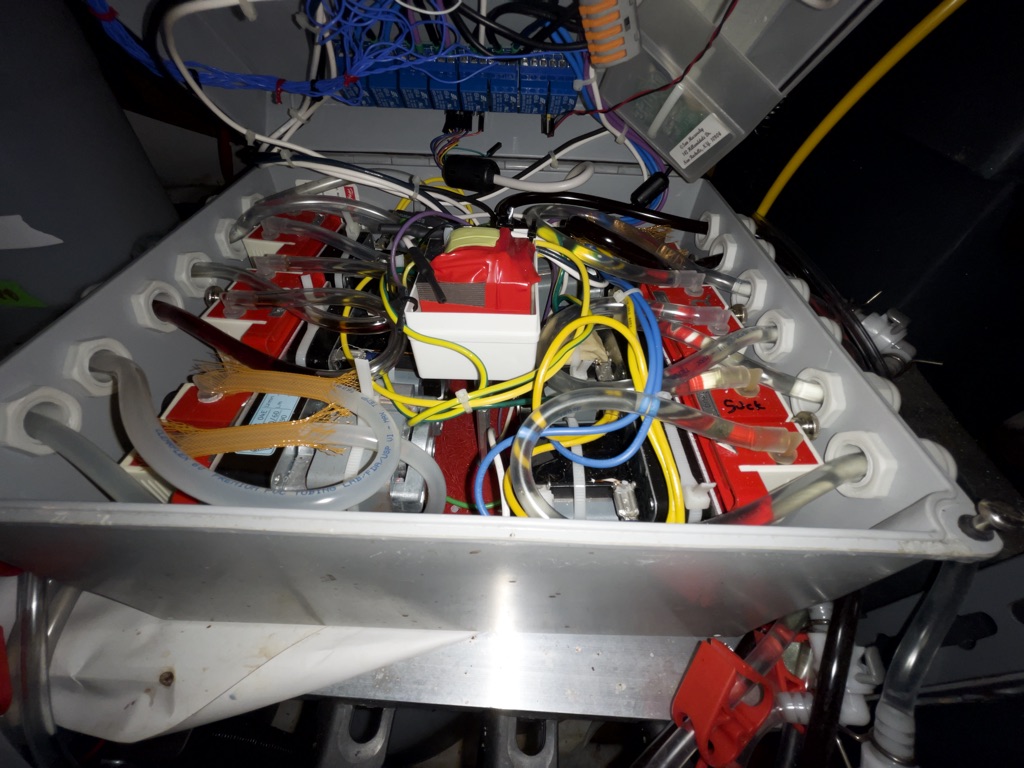
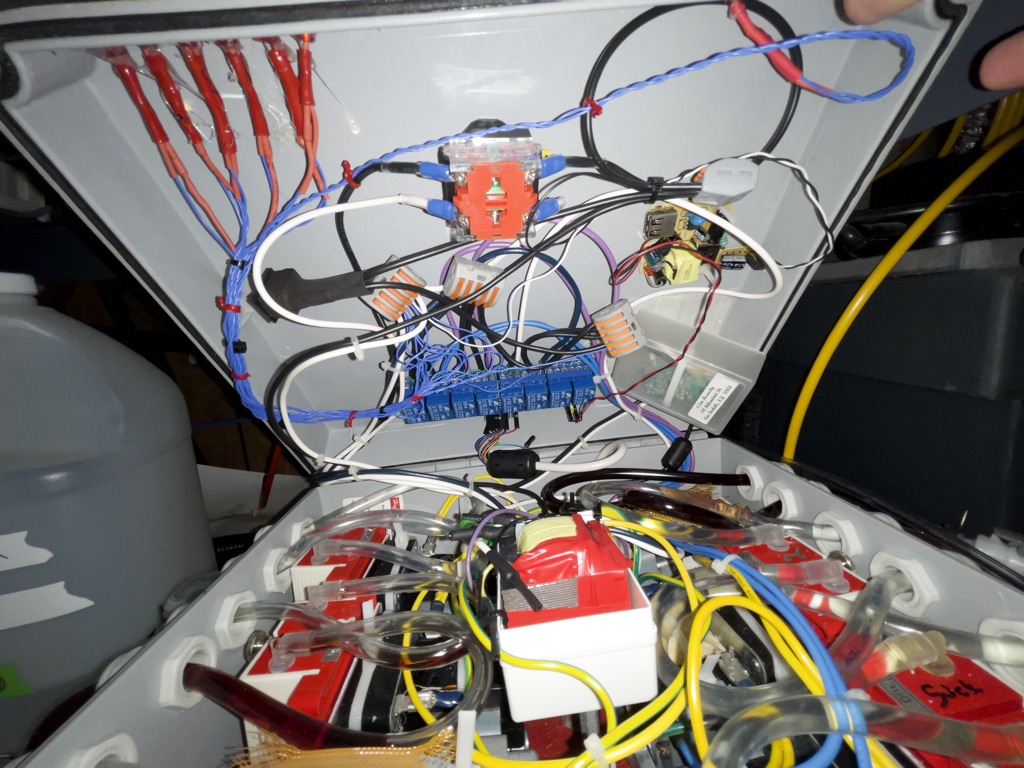
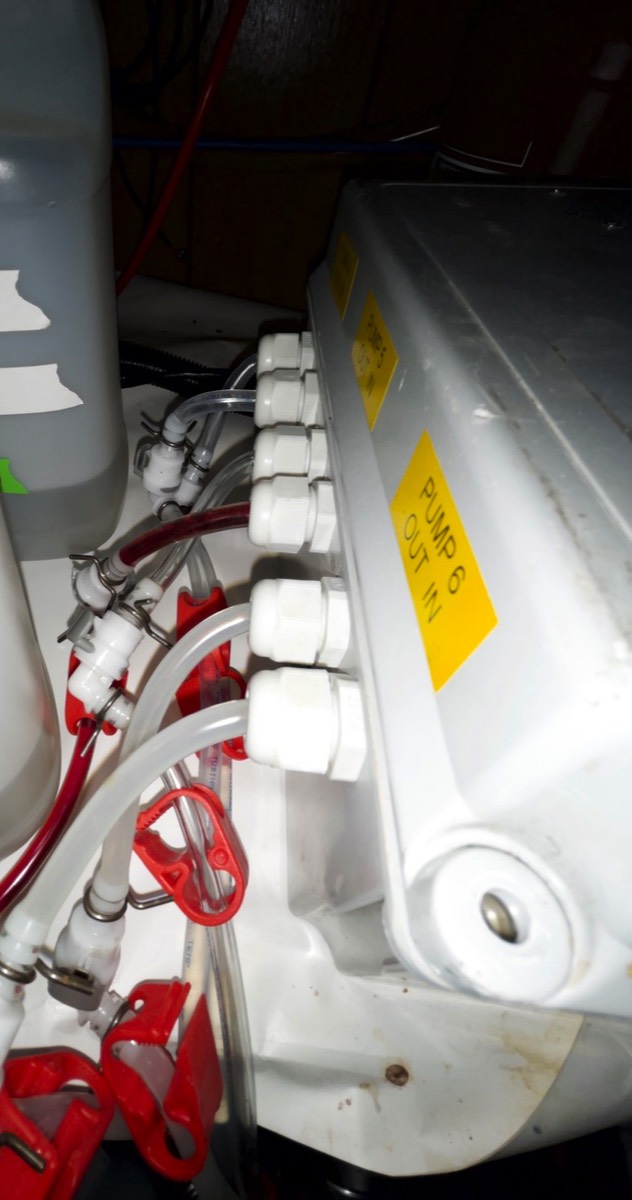
The largest and most complex project to date has been the replenishment system.
This is a totally custom system for E-6 replenishment. Its based on 6 peristaltic pumps, the same ones sold by Jobo.
At least a hundred feet of tubing and a lot of connectors. This project isn't for the faint of heart or wallet.
I only had 5 110v pumps so I had to get creative to make a 220v one work.
I bought a 110v-220v travel transformer from Amazon. Gutted it and it now powers that pump.
Luckily that pump is also a 60hz like the others. So no speed loss.
That assembly in to a case that’s probably a few inches too small too about a day of work.
Annoyingly the case is fiberglass and you can guess how itchy it got.
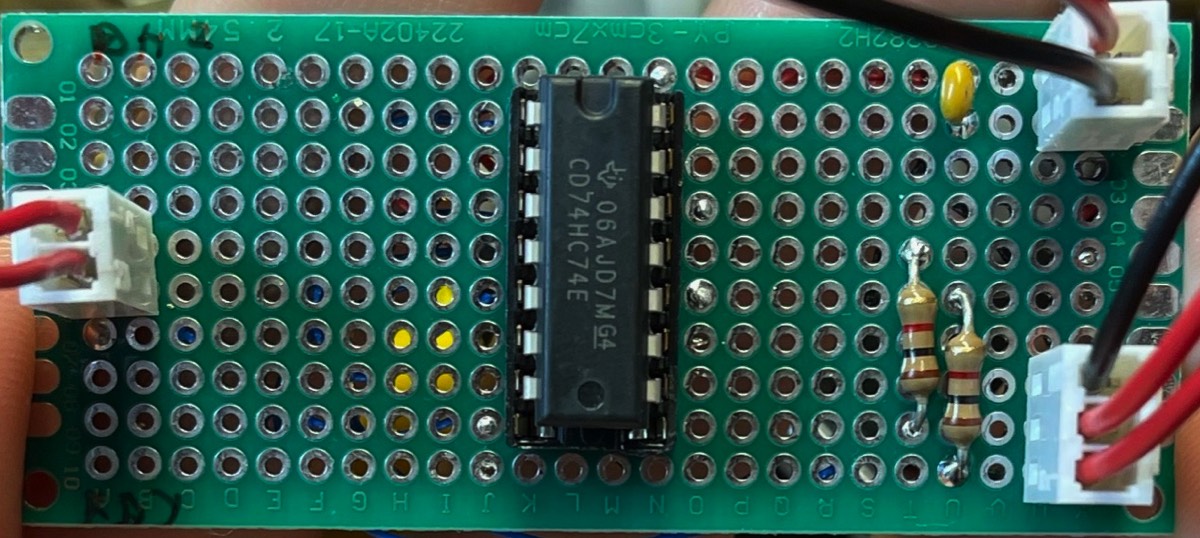
The largest amount of time (and its still an ongoing project) is the controller.
The controller is an Arduino Uno. It sends control signals to the relay bank to turn the pumps on and off.
Its simple but complex.
First the relay board had to powered separately. The 6ft long cable to the controller dropped enough voltage and had too much interference.
The controller programing could have been really simple but why do that.
It has dozens of menus to set and store all aspects of the programing.
Form timing to delays to beeps. All of that is stored in the EEPROM.
The code base nearly fills the entire Atmega 328p. Some creative coding was needed but it all fits.
The replenishment system has been used at least 1000 times without a hitch.
The only thing I didn’t implement was a counter….should have done that!
First upgrade was the large LCD display. This is actually the display Jobo used at trade shows!!
It was expensive but you can make the same by buying a large LCD display and hooking it up.
At some point the built in control panels buttons stopped working.
The OEM was a button on flex construction. Over time it suffers from shorts and opens and needs to be replaced.
I happen to have a new button panel but I wasn’t sold on just replacing it with more of the same.
Instead I made my own. Its not hard at all. I even added something I always wanted, a dedicated RESET button!
I ordered the 2300 upgrade kit from Germany. It was expensive but worth it.
The front bottles are dedicated to E-6 and the back are B&W and C-41.
Over the years OEM Jobo parts for all of the ATL series are getting harder to find and more expensive.
I happen to have a large stock of them but I figured I could do better.
I modeled and printed a number of new parts for the Jobo. That includes some gears not pictured.
The 3d printed parts are made from ABS and have lasted as long and work just as or better than the originals.
The majority of all of the tubing has been replaced. In the US metric tubing is expensive so its all imperial.
The sizes are close enough and it works. The OEM tubing was heat formed, I didn’t go that route, just standard tubing.
The circulation motor failed and has been replaced. It’s COTS for a VW car. Amazon has them.
The gearing in the air distributor failed. It’s a nylon gear and it subject a lot of torque.
It rounds off easily, even the new ones I have are a bit rounded.
So that was one of the 3d printed parts and its been working for years.
The lift arm was leaking and that’s a matter of lubricating it and sealing the drain.
A recent addition was a PAUSE and STOP for the 6502 processor and the rotation motor.
Both are simple additions but require some time and soldering.
I also added some PVC pipes to drain the solutions form the processor.
It’s necessary to have large tubes to cope with the potential of up to 1000mL of solution.
That drains in to a bucket with an automatic pump drain.
Another of the many issues is the power entry module.
Recently that was getting extremely hot and had to be replaced. It got so hot that the sand in the fuses melted.
So be careful and change yours out.
Another project was installing a heat exchanger to hopefully stabilize the wash water.
E-6 requires a very specific and stable first wash temperature. If it varies, you can see some changes in the overall color.
The largest and most complex project to date has been the replenishment system.
This is a totally custom system for E-6 replenishment. Its based on 6 peristaltic pumps, the same ones sold by Jobo.
At least a hundred feet of tubing and a lot of connectors. This project isn't for the faint of heart or wallet.
I only had 5 110v pumps so I had to get creative to make a 220v one work.
I bought a 110v-220v travel transformer from Amazon. Gutted it and it now powers that pump.
Luckily that pump is also a 60hz like the others. So no speed loss.
That assembly in to a case that’s probably a few inches too small too about a day of work.
Annoyingly the case is fiberglass and you can guess how itchy it got.
The largest amount of time (and its still an ongoing project) is the controller.
The controller is an Arduino Uno. It sends control signals to the relay bank to turn the pumps on and off.
Its simple but complex.
First the relay board had to powered separately. The 6ft long cable to the controller dropped enough voltage and had too much interference.
The controller programing could have been really simple but why do that.
It has dozens of menus to set and store all aspects of the programing.
Form timing to delays to beeps. All of that is stored in the EEPROM.
The code base nearly fills the entire Atmega 328p. Some creative coding was needed but it all fits.
The replenishment system has been used at least 1000 times without a hitch.
The only thing I didn’t implement was a counter….should have done that!